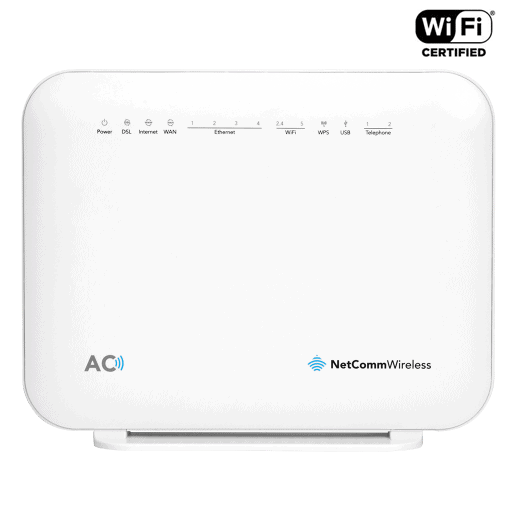
| Default IP | 192.168.20.1 |
| Default Login Username | admin |
| Default Login Password | admin |
| WiFi Details | 802.11b/g/n 2.4GHz |
| Ethernet Details | 1x 1000Mbps WAN port 4x 1000Mbps LAN ports |
| Compatibility | All NBN and Fixed Wireless for up to 1000 Mbps connection |
| Modem Emulator | NF18ACV Emulator |
| Modem Setup with Swoop |
|---|
| In most cases, your modem should automatically get configured with Swoop, because to make it easier for our customers we support both IPoE (Dynamic) and Flexible PPPoE connection for NBN services. As long as your modem is in either of those modes, it should just work (regardless of PPPoE username and password stored in your modem). However, if automatic setup didn’t not work you, please follow below modem setup instructions. |
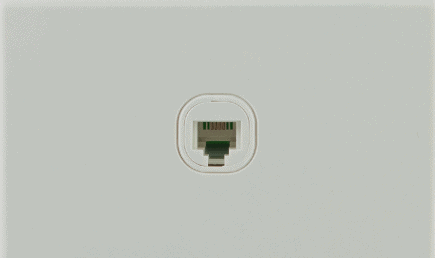
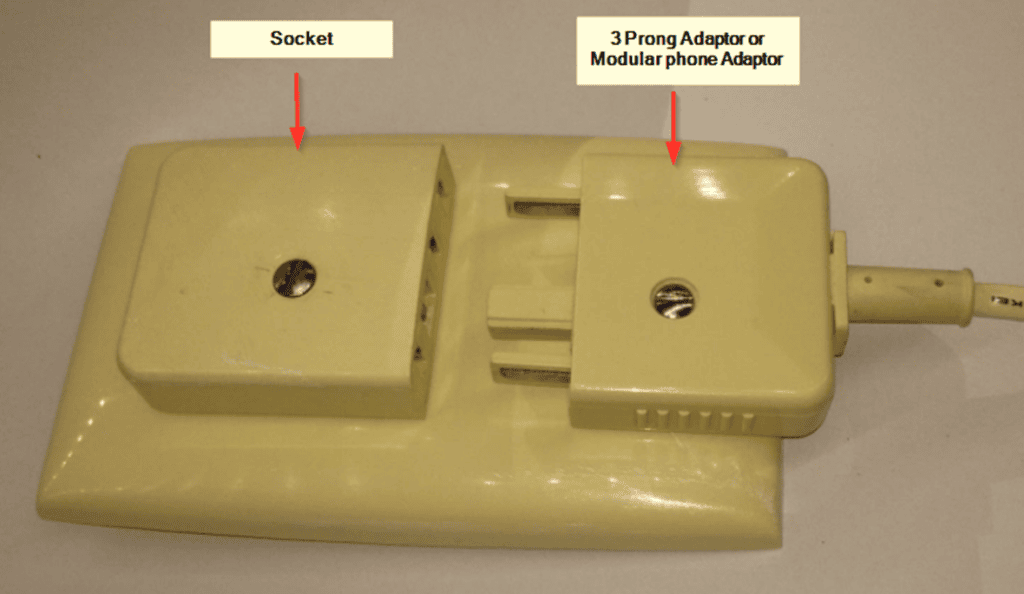
Find the Phone Socket
There are 2 types of Phone socket
- Normal Phone Socket
- Older Style Phone socket (Sometimes may need to buy a “Modular Telephone Adaptor Plug” if its missing)
Please note, FTTN/B does not require any filter
| New Phone socket | Older Style Phone Socket |
 |  |
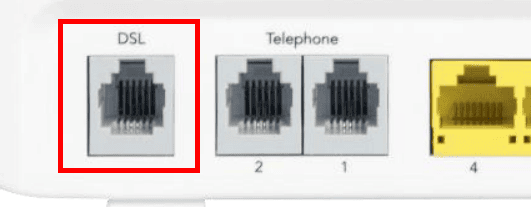
Connect the Modem to the Telephone Socket
One end of the phone cable goes to the telephone socket on the wall and other end goes to the DSL port (grey) of the modem.
Please note, it is recommended to use normal 1m long cable, longer cable can cause problems.
Ensure you have “Sync“
You can check via DSL light on modem

Please note, if your “DSL” light is not solid green, please contact Swoop on 1300 66 55 75 for assistance
Connect a device to your modem
Ensure the modem is connected to a device such as laptop, tablet, or phone etc. via Ethernet or Wi-Fi.
Default Wi-Fi password is located on your modem sticker.

Login to your modem
Now open any browser (Chrome, Edge or Safari) and type 192.168.20.1 and press enter.
Now you’ll be greeted with login screen, default username is admin and default password is the word password.
If you have set a custom password, they need to enter that. If you do not remember it, you can factory reset the modem and then login via default credentials.
Please note factory reset will remove all custom settings such as Wi-Fi name, password etc.

Setting up Connection
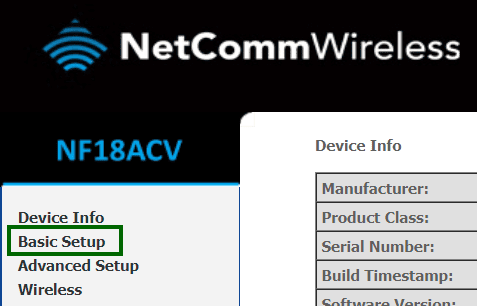
Step 1: Click on the Basic Setup menu item on the left side of the screen
Step 2: Select VDSL and click Next

Swoop supports both IPoE and PPPoE authentication for all NBN services 🙂
Step 3:
- For IPoE (Dynamic) Setup select IP over Ethernet (IPoE)
- For PPPoE Setup select PPP Over Ethernet (PPPoE) with no VLAN tag
- Click Next

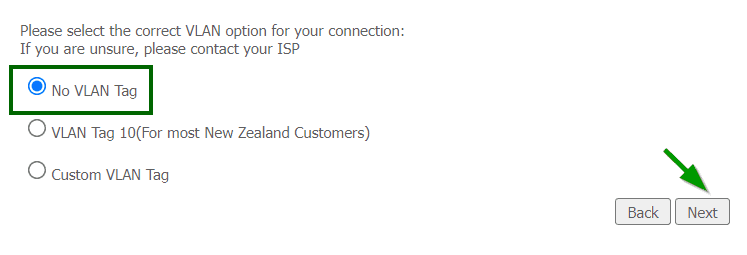
Step 4: Select no VLAN Tag
Step 4.1 For PPPoE Setup only (for IPoE setup, skip this step)
- Enter your username and password
- Click Finish

Step 5: Select Obtain an IP address automatically and click Next

Step 6: Click Apply/Save

Now modem will reboot and can take up to 5 minutes to setup.
Physical Buttons

| Button | Description |
|---|---|
| 2.4G WPS button | Press the 2.4G WPS button to activate the WPS PBC pairing function for the 2.4GHz radio |
| 5G WPS button | Press the 2.4G WPS button to activate the WPS PBC pairing function for the 2.4GHz radio |
| Power button | Toggles the power on and off. |